Lightroom Mobile Presets – they’re a beautiful thing! I’ve shared before how to download, import and install them onto your phone, so now it’s time to teach you how to use them to make your phone photography editing a snap tap! First you need to make sure that you have Lightroom Mobile on your device (it’s free, ya know?) After that, you want to make sure you have a preset or two on your phone to use them.
How to Use Lightroom Mobile Presets
Now that you’ve got some Lightroom Mobile presets all ready to go – let me show you how to use them so you can get those photos picture perfect in about 3 seconds! (Thanks goes out to my friend Dawn for letting me hijack her phone to show you since mine already had 57 billion photos in LR – ha!)
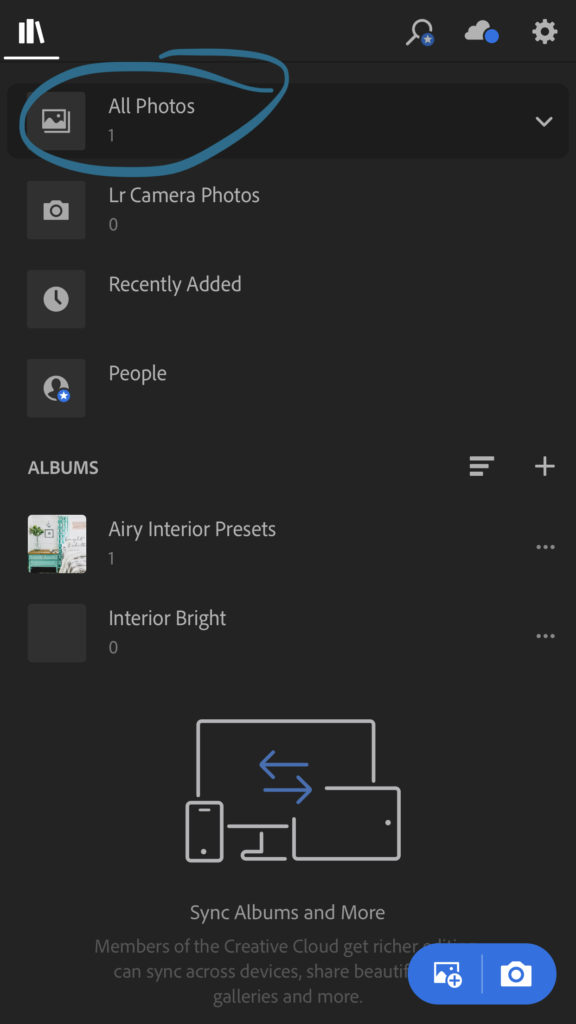
First, open up your app and go to your library.
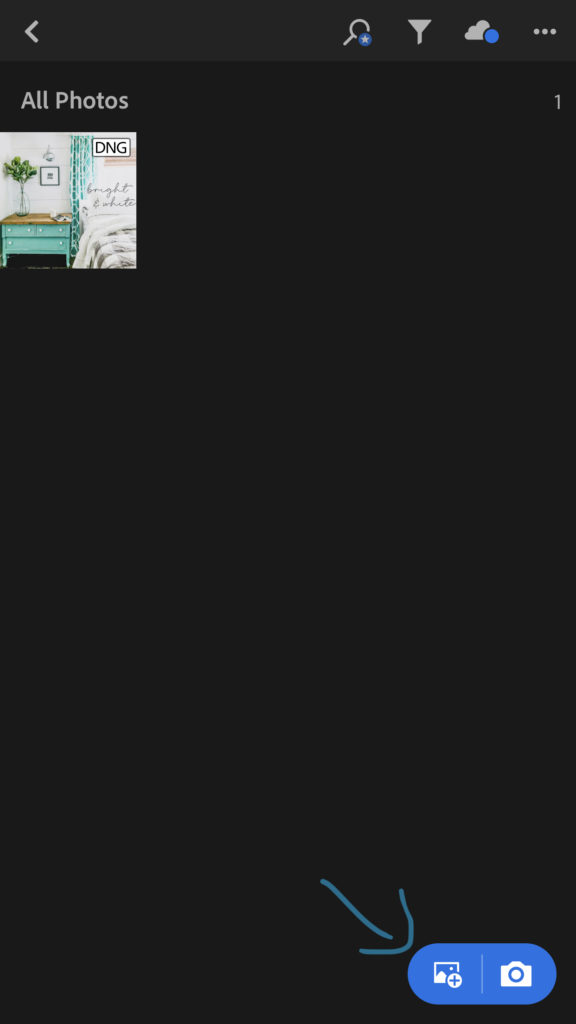
Next, click on the left hand side of the button in the bottom right corner so you can add photos to your album.
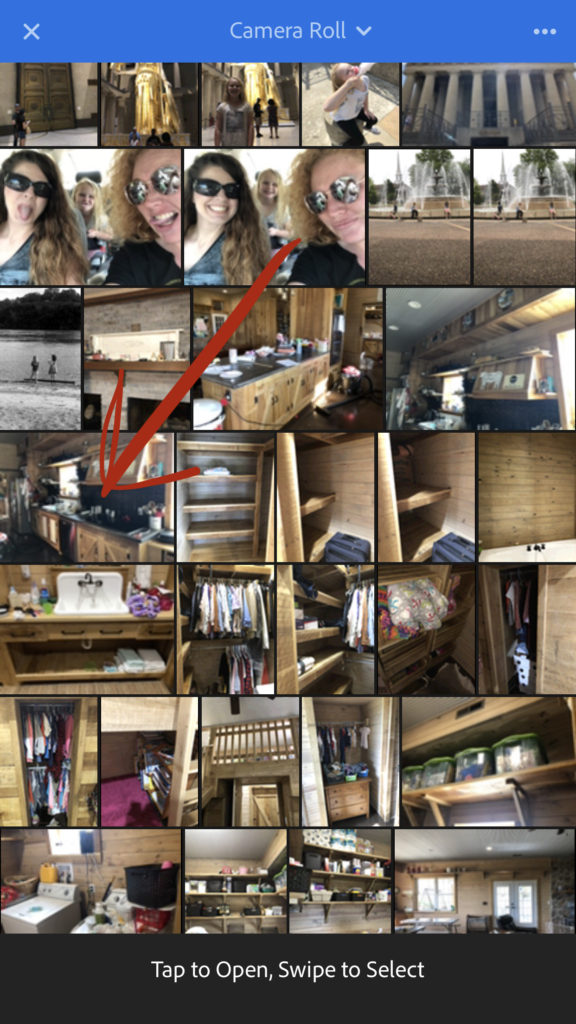
After that, choose the photo you’d like to edit with your preset and tap on it. Then it will open in the editing area of your Lightroom Mobile app.
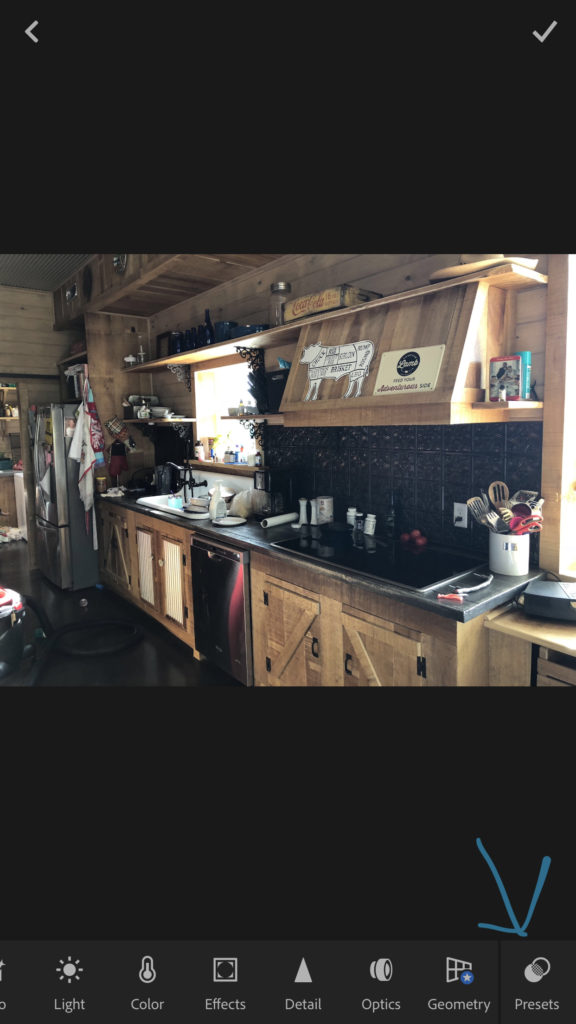
Once you photo is loaded into the editing area, then use the bottom slider and go all the way to the right and you’ll see PRESETS. Choose that to open them.
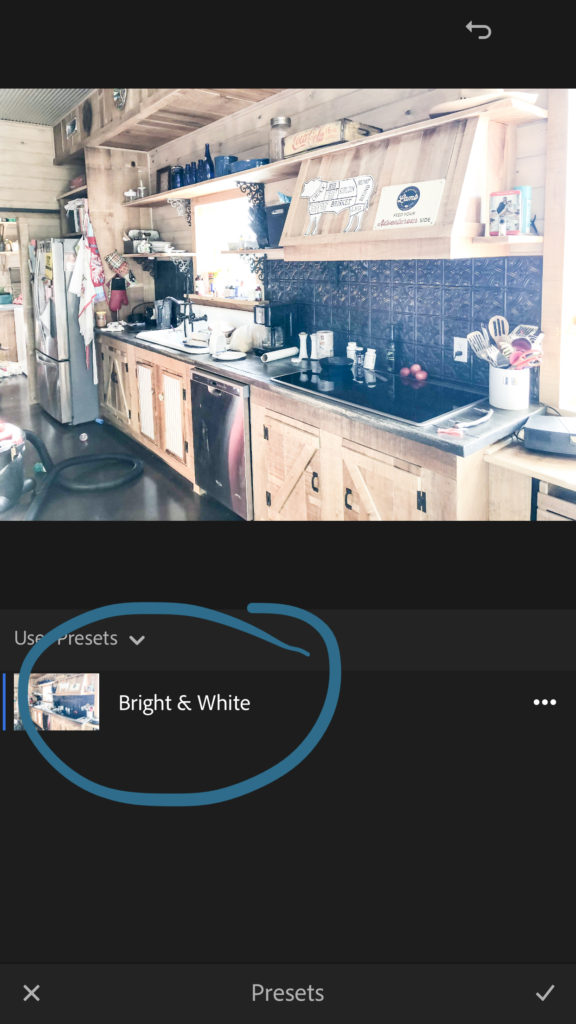 Once you have the preset you want, then tap on it to add it to your photo.
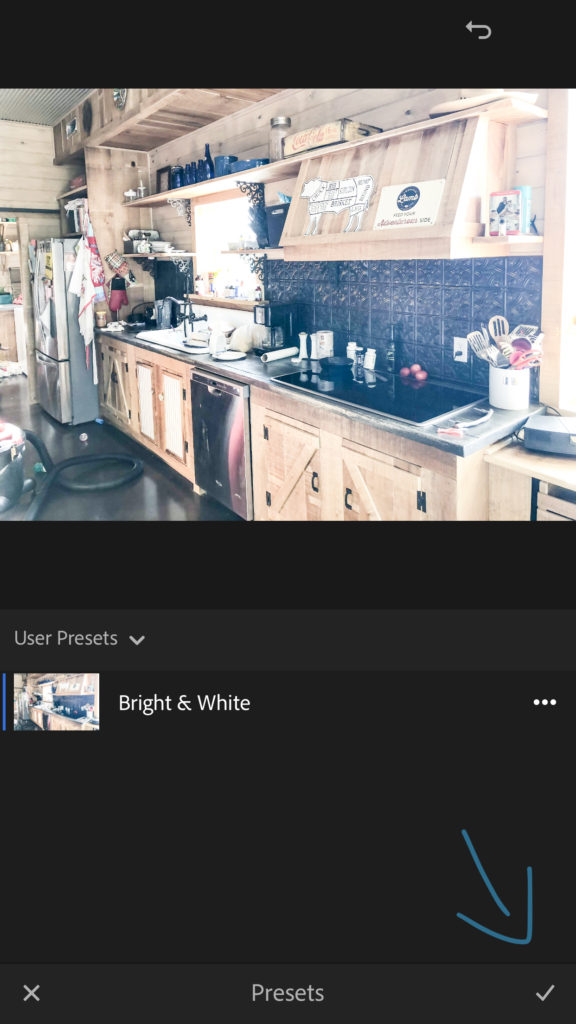
Then click the checkmark at the bottom to save it and you’re done!
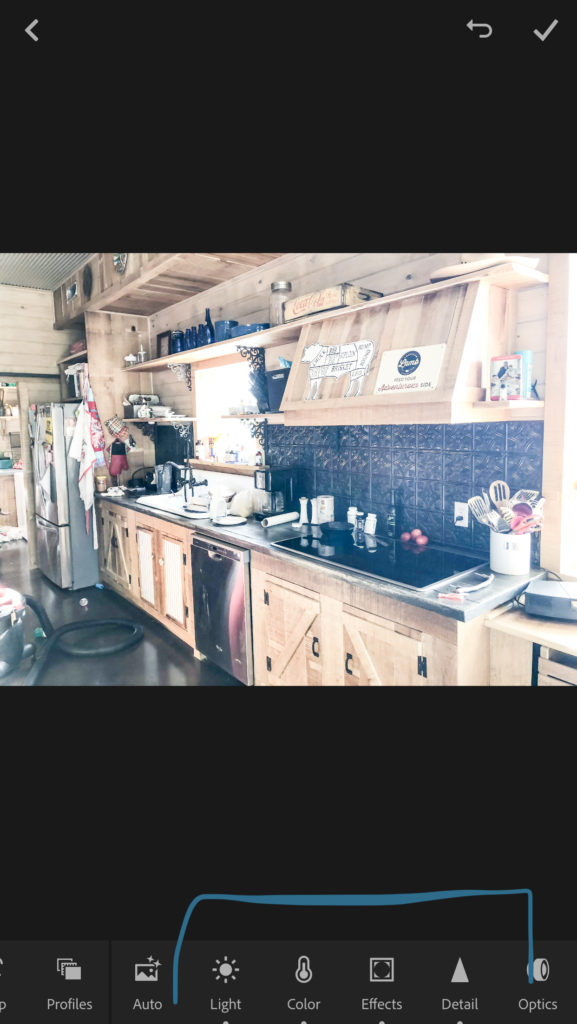
Of course, if it’s a little too bright or dark – you can still adjust the photo a tiny bit using the controls at the bottom of the app on the slider.
And that’s it! It’s so easy to put these presets to work so you can make the most of your photos. Want to see more dramatic before and afters?!? Here are a few of my own:
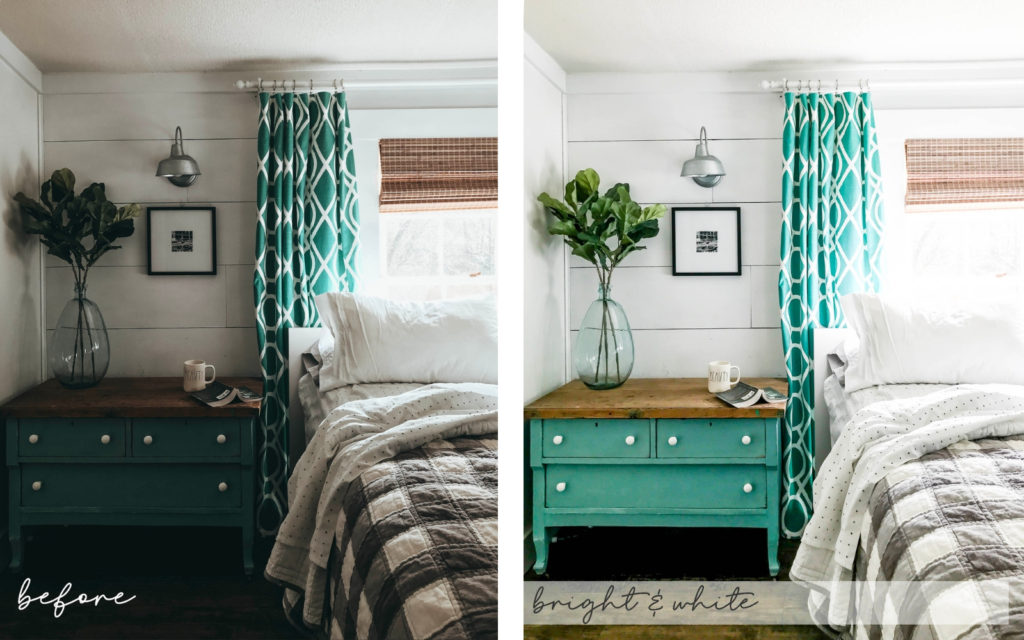
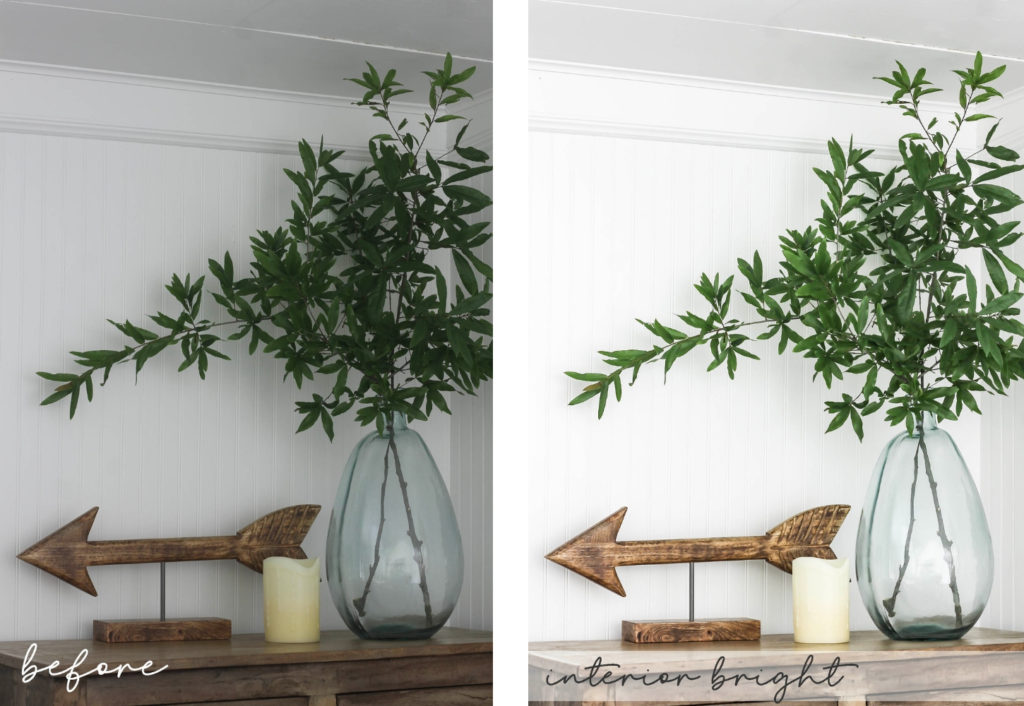

Want to snag these presets for free?!? Just fill out the form below and I’ll send them straight to your inbox!


