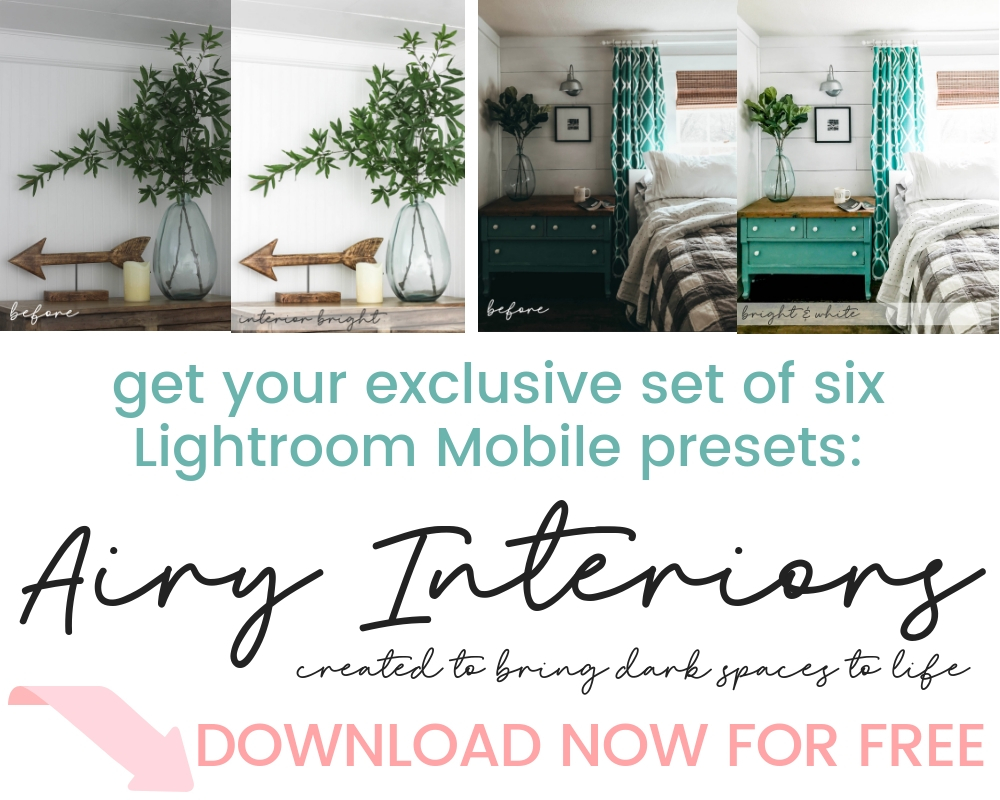
Have you tried Lightroom Mobile Presets? I’ve gotta tell you – they are a game changer! They take away the agony of trying to get your photos from blah to BAM – in literally one tap. Setting them up takes about 60 seconds, but the time it will save you in the long run is so worth it. And I’m going to walk you through it step by step.
What are Adobe Lightroom CC Mobile Presets?
Presets are like shortcuts to turning your photos into expertly edited photos with one tap. It’s a set of “instructions” you use in the free Adobe Lightroom CC Mobile app to edit your photos. To use them, just choose your photo – hit the preset you want and you’re done. It’s so easy!
PLEASE NOTE: There are a LOT of photos in this post. Do not be intimidated – I’m showing every tiny step so you know exactly what to do and won’t get lost, k? Let’s get to it!
You’ll need these apps for this to work on an iPhone (
How to Download Lightroom Mobile Presets
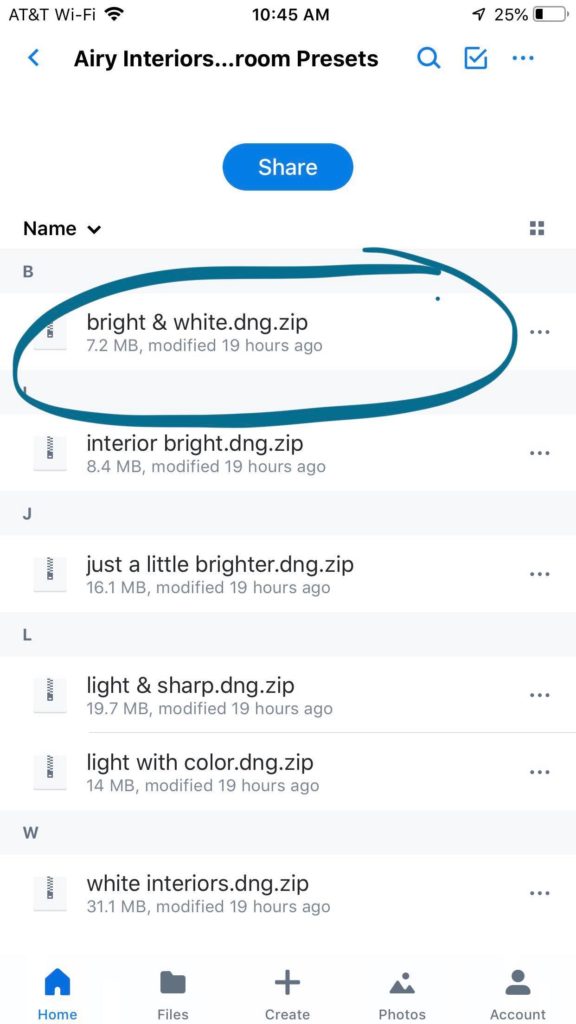
Next, you need to download your presets (you can find my free ones at the bottom of this post). These are in Dropbox, so you may have to have that app, too. If you’re on an iPhone, you’ll need the “Unzip” app because almost all Lightroom Mobile Presets – including mine – come in a zip file. Click on the file name.
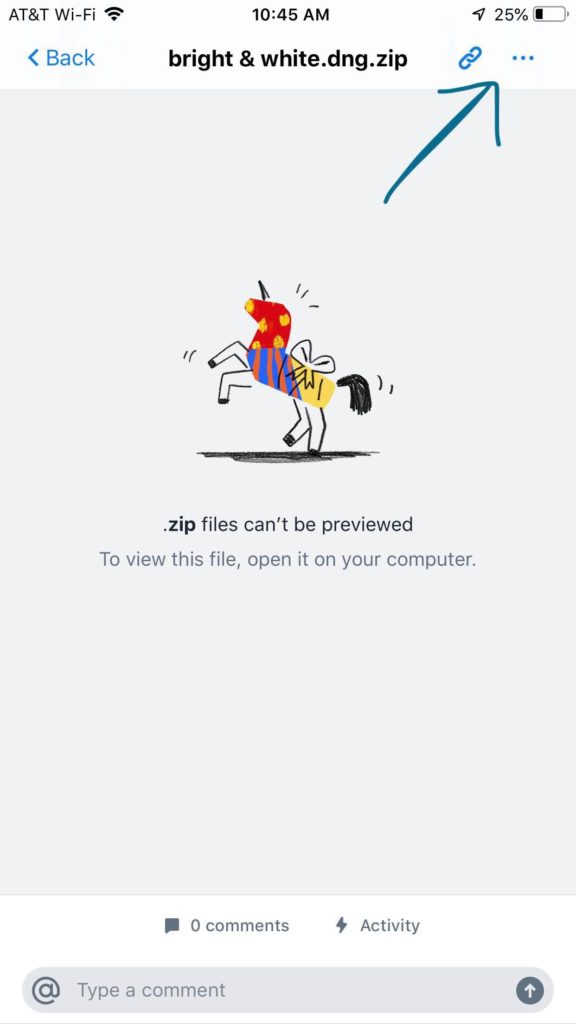
Next, click on the three dots “…” in the upper righthand corner to open a menu.
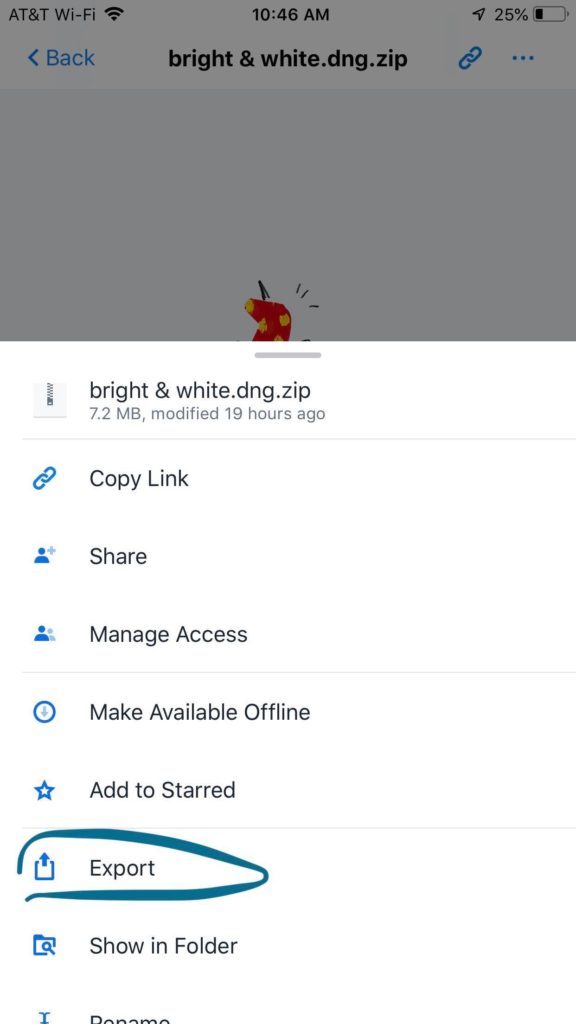
Once the menu is open – then select “EXPORT”
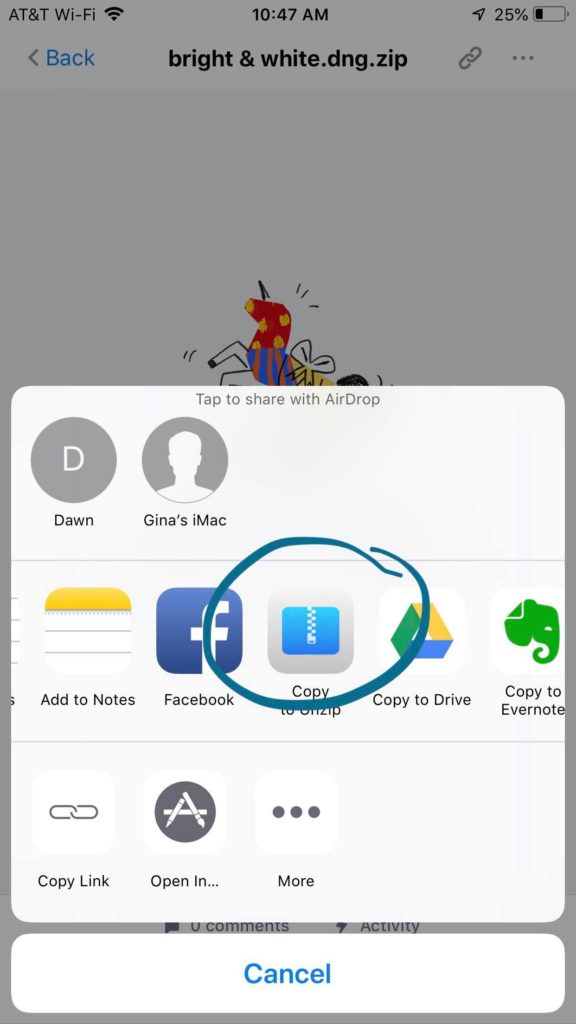
Then select the UNZIP app – you may have to scroll across a bit to find it, depending on how many apps are on your phone.
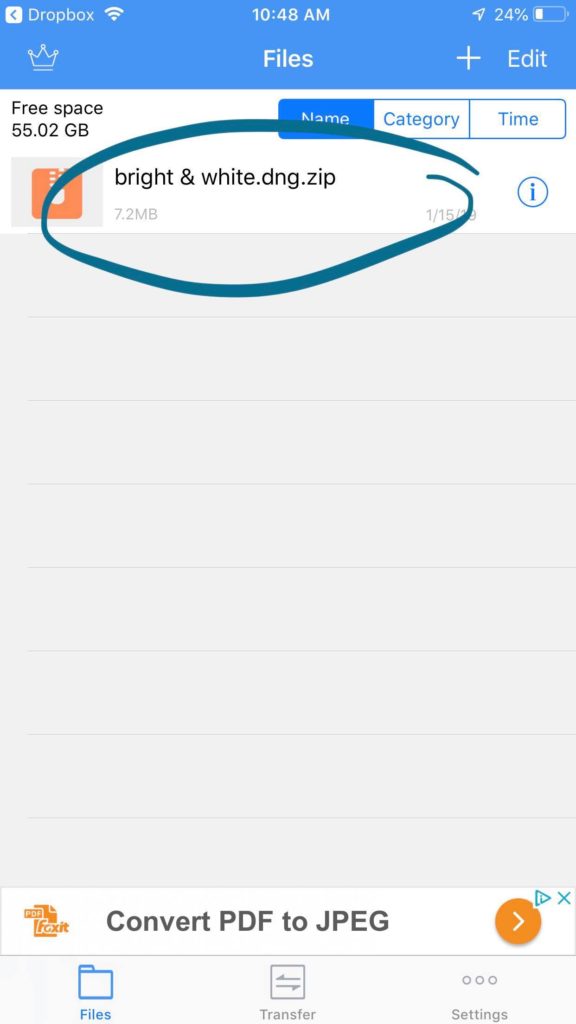
When it’s saved, then open up the Unzip app – and tap on the file name to unzip the file.
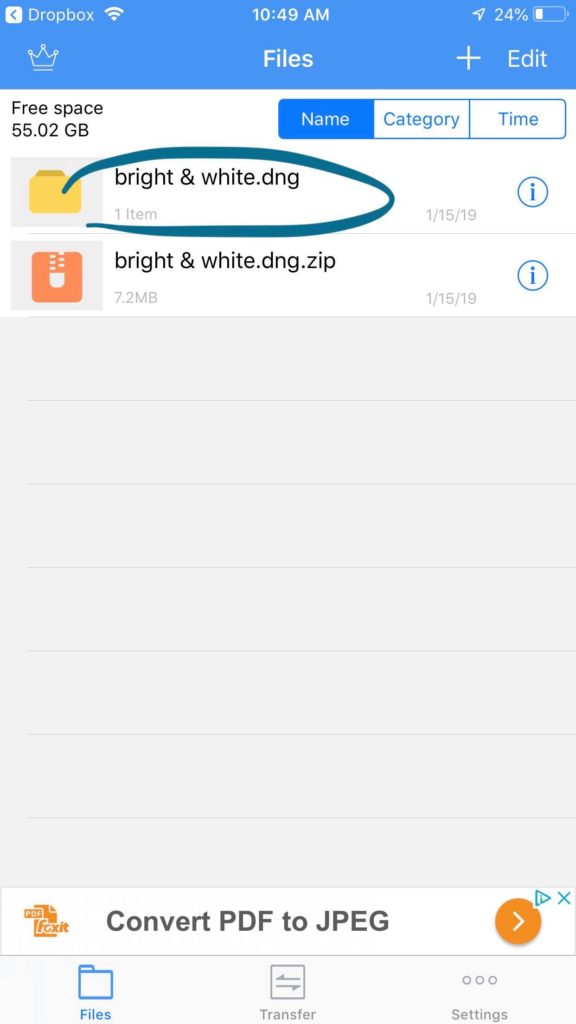
After it’s unzipped, you can click on the folder name to see the file.
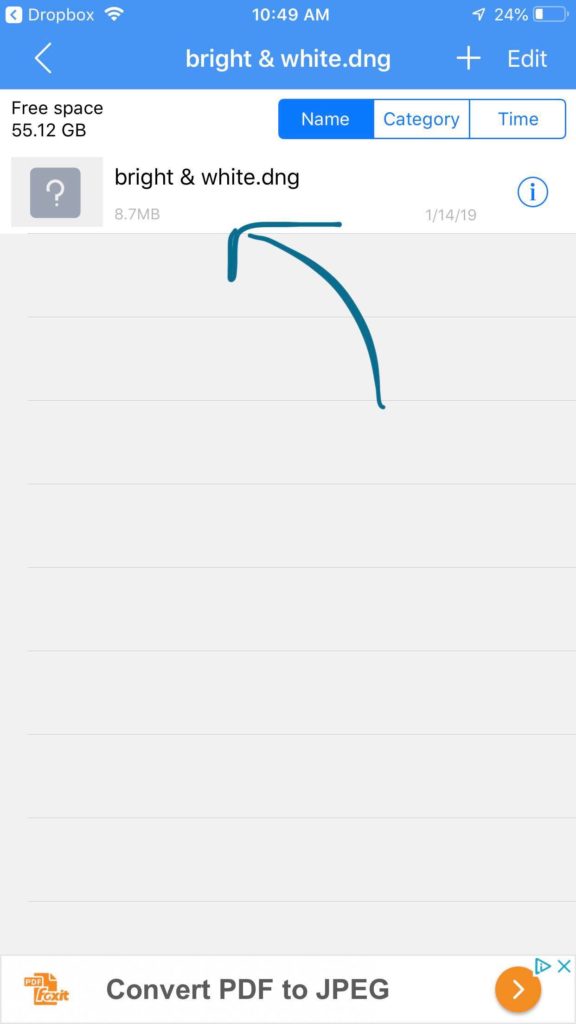
Now your preset is ready to install into Adobe Lightroom CC Mobile.
How to Import Lightroom Mobile Presets
First, you’ll need to install Lightroom Mobile on your phone by downloading it from the App Store. Once you have it on your phone, you’ll need to “sign up” using either your Facebook or email address. Unlike desktop Lightroom, it’s completely free. Though if you do have Creative Cloud, it will sync them for you so once you have the presets on your mobile device it will then add them on your desktop version – sweet, huh?
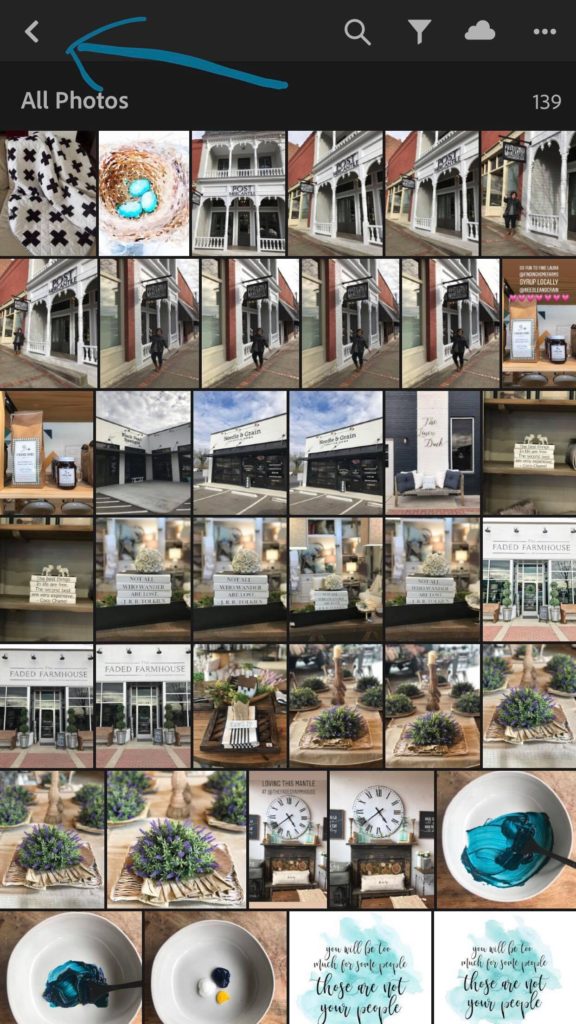
Once you have the app downloaded and opened, you’ll need to make sure you are in your library. The default setting is “Photos” – so choose the arrow in the upper left hand corner to get to your library.
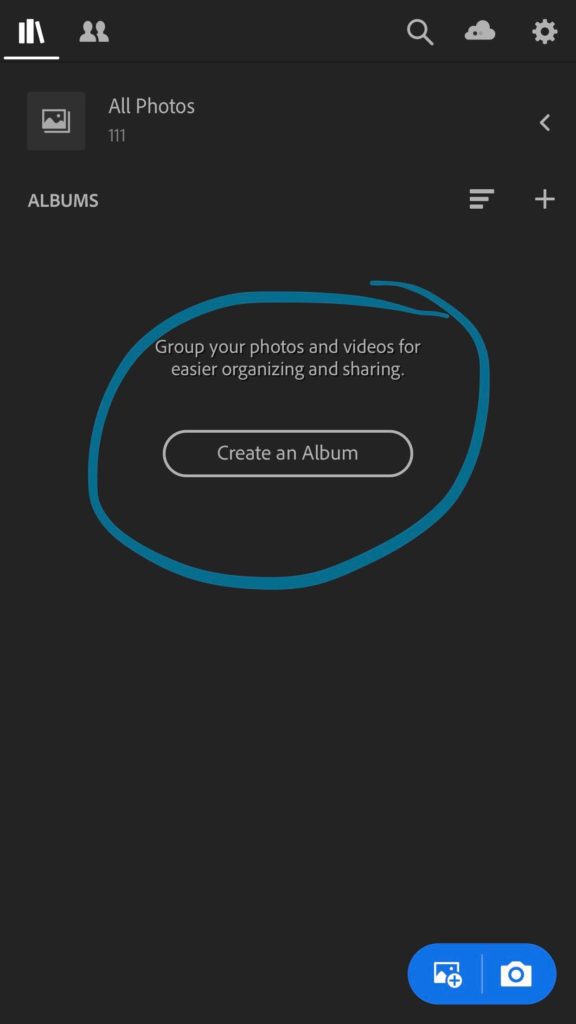
Now let’s create an album. Click on the “Create an Album” button.
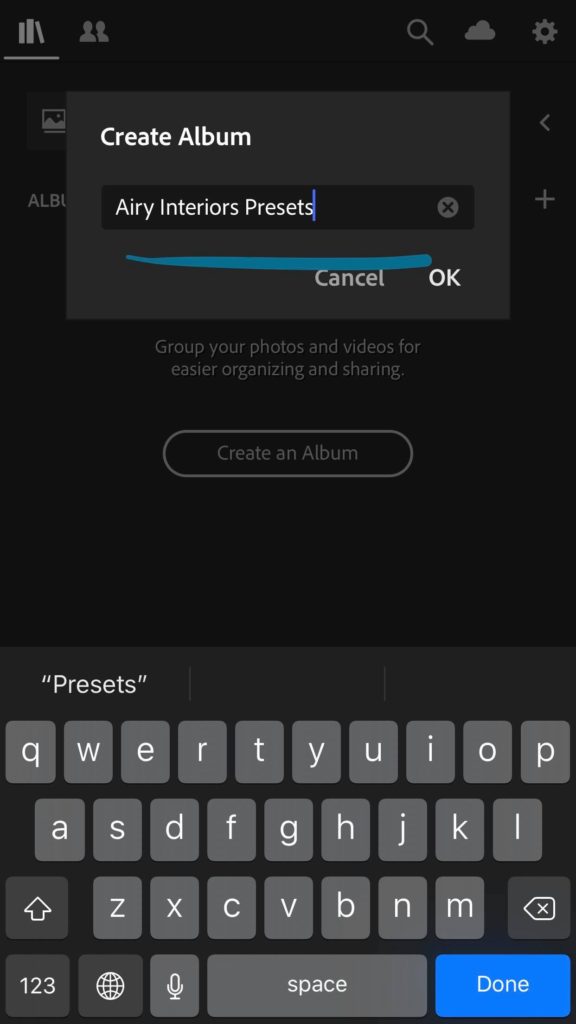
Then name your Album and click “OK”.
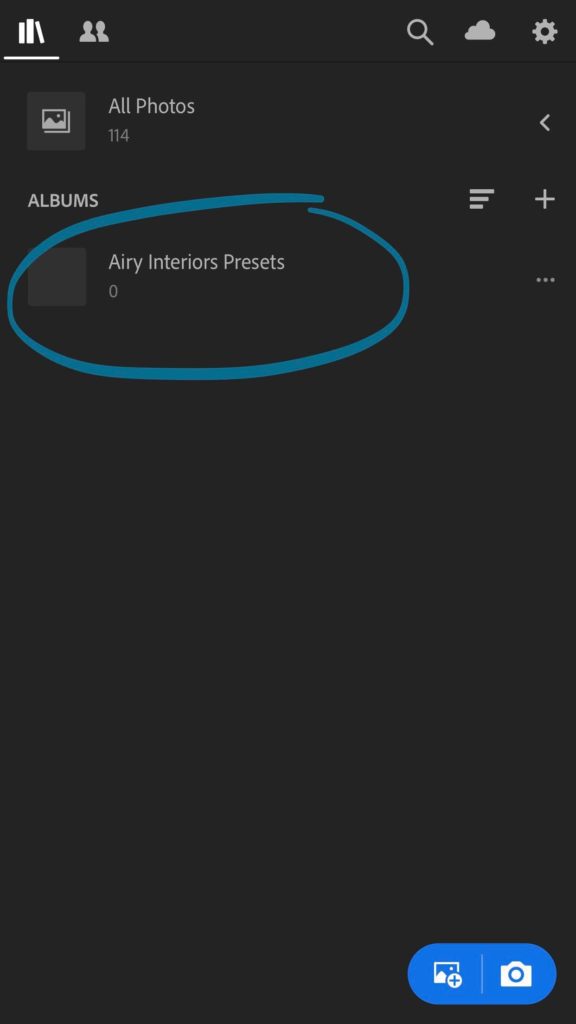
Your album is there, but you’ll need to import your files – so click on it in the library.
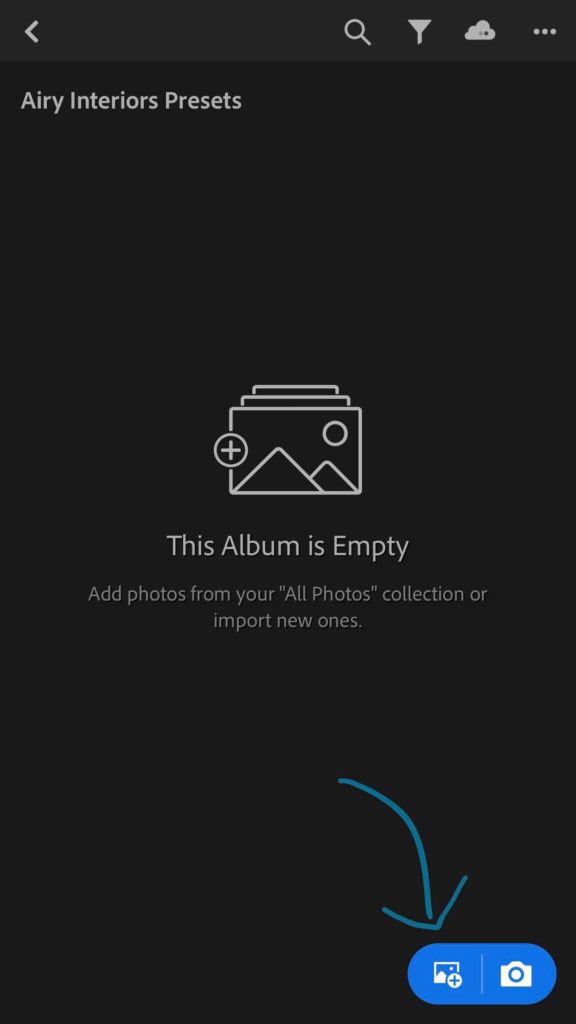
It will say “This Album is Empty” – so let’s import the files now. Tap on the add icon on the left side of the button in the bottom right hand corner.
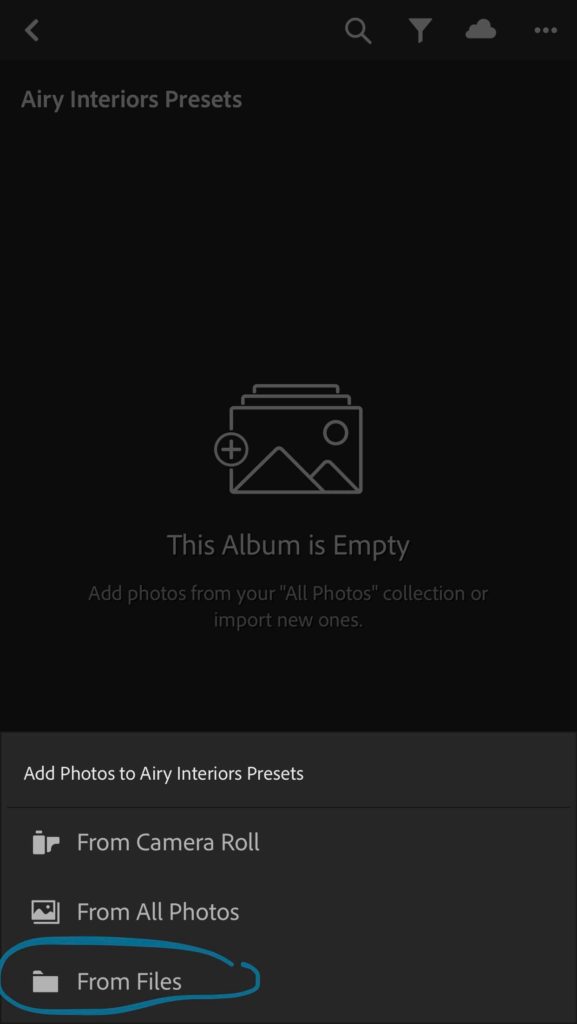
Then choose “From Files” from the drop down menu.
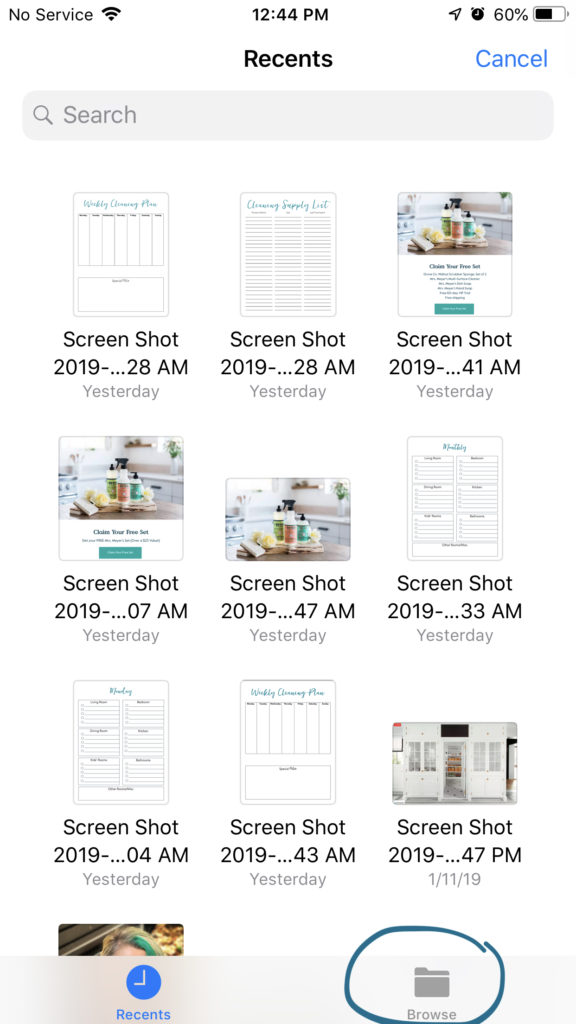
At the bottom, you’ll see “Recent” and “Browse” – choose BROWSE
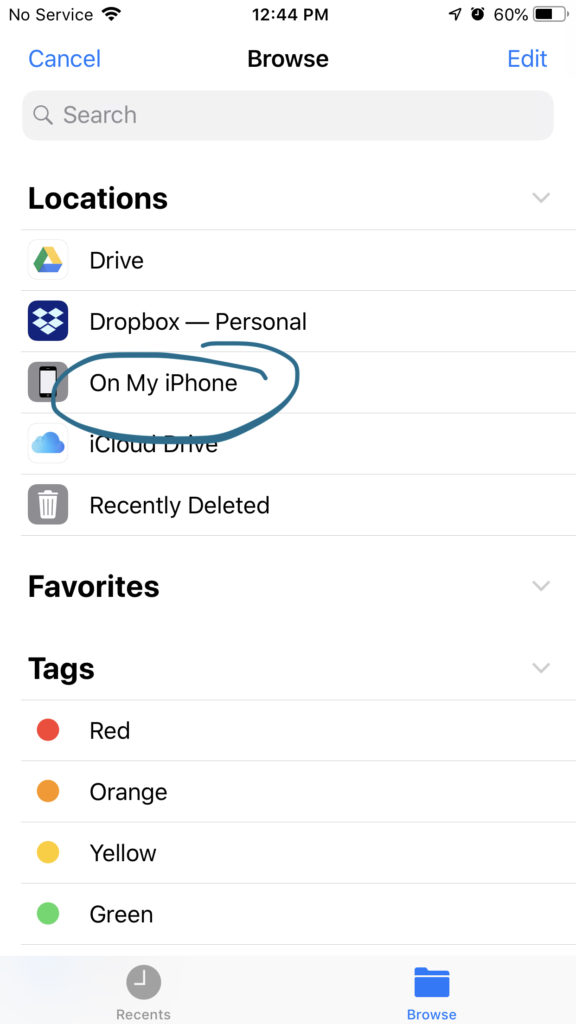
Then you’ll see different locations – choose ON MY IPHONE
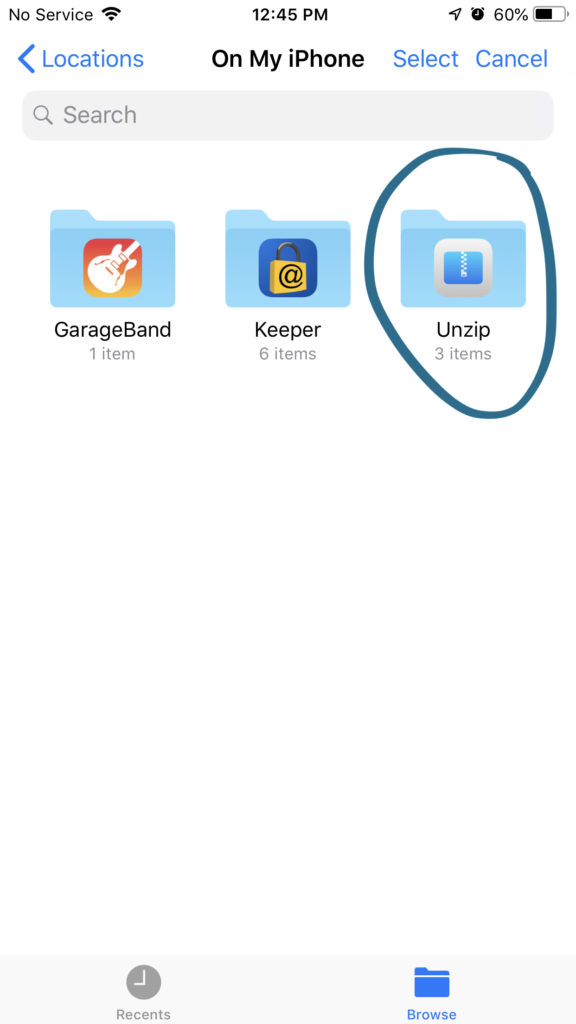
Then choose the Unzip App from your phone.
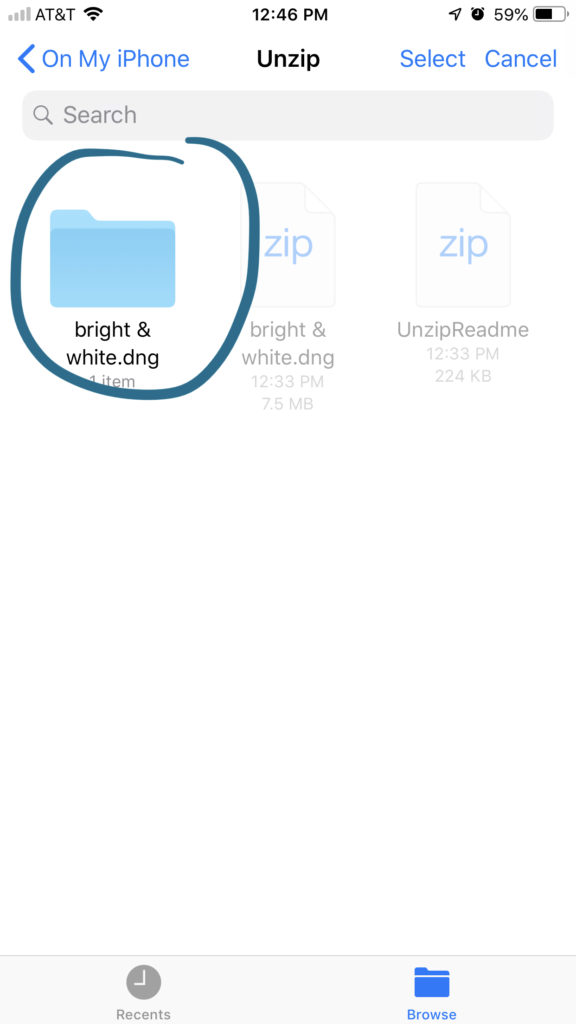
Then you will find the folder with the Lightroom Mobile Preset you’d like to import – so select it.
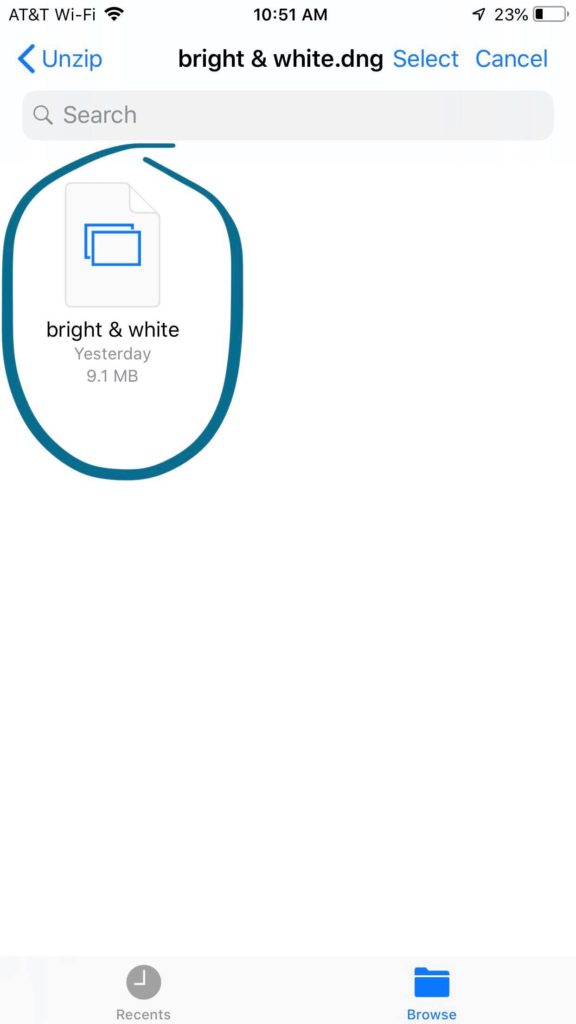
Inside that folder you’ll see the file – tap on it and it will import it into Lightroom Mobile. So now switch to that app.
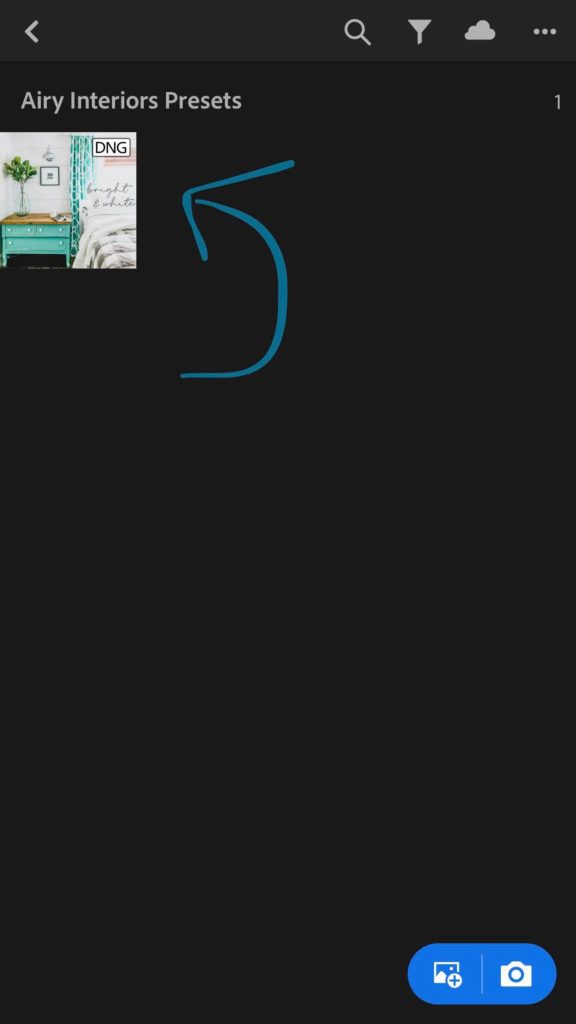 Now your preset is IMPORTED – so let’s actually INSTALL it into your Lightroom Mobile App.
How to Install Lightroom Mobile Presets
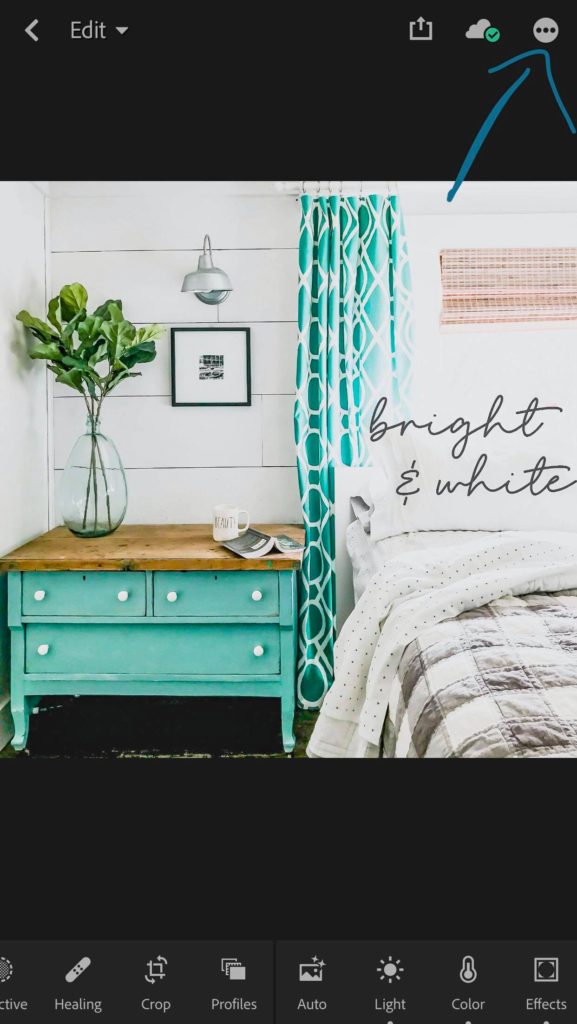
Go into your album where you imported the file and tap on the file. It will open it into the editing area. Now Click on the three dots “…” in the upper right hand corner.
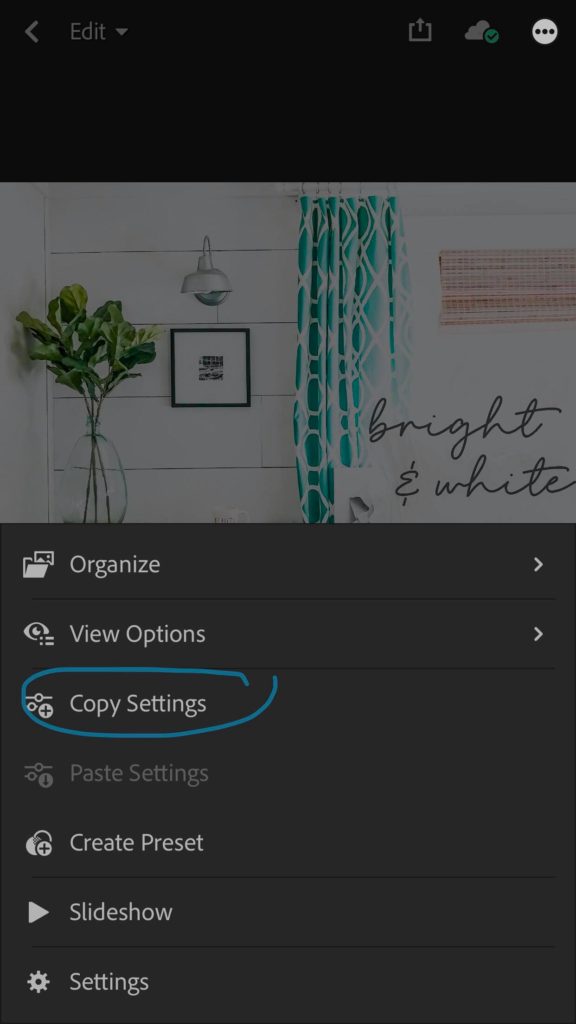
That will open a menu and you need to select “COPY SETTINGS”.
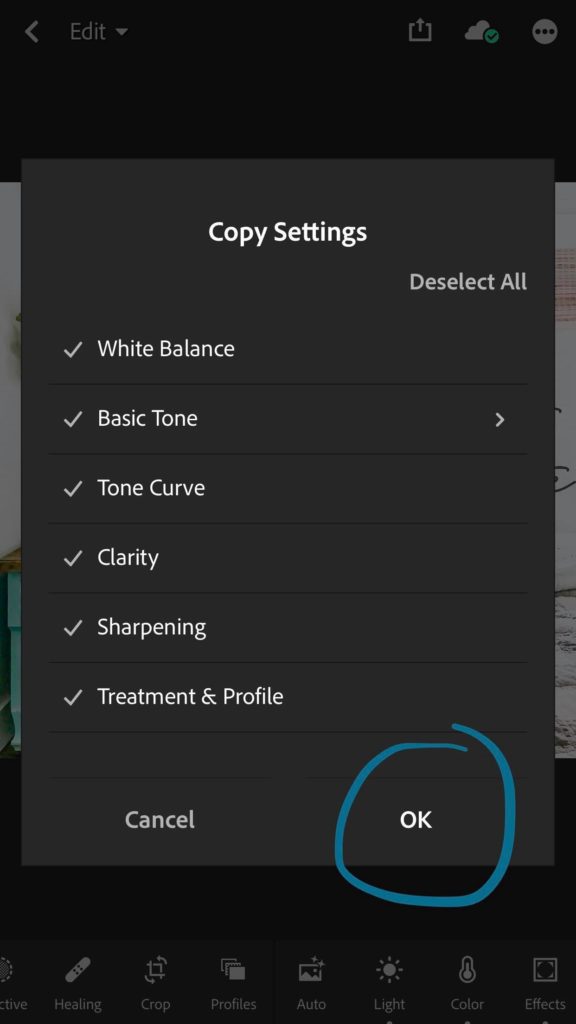
Then click OK so you now have all the settings of that preset on your clipboard.
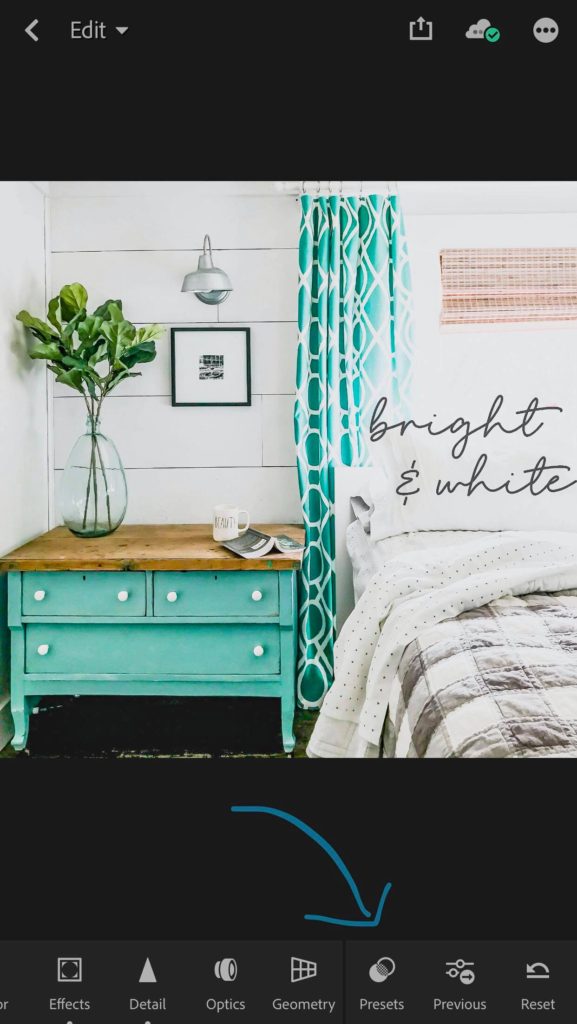
Now scroll over a tiny bit on the bottom slider area and select PRESETS.
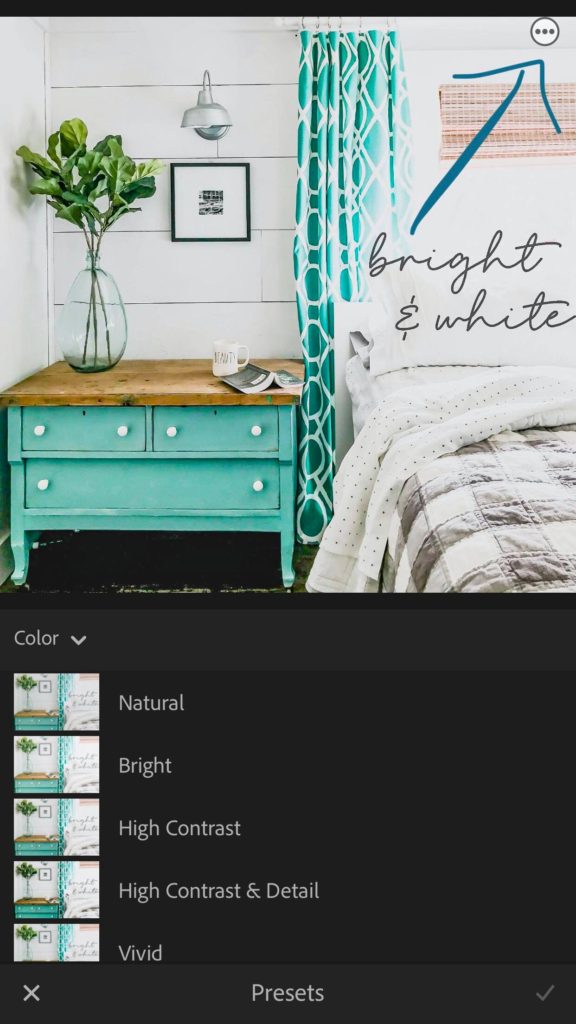
Tap on the three little dots “…” in the upper right hand corner.
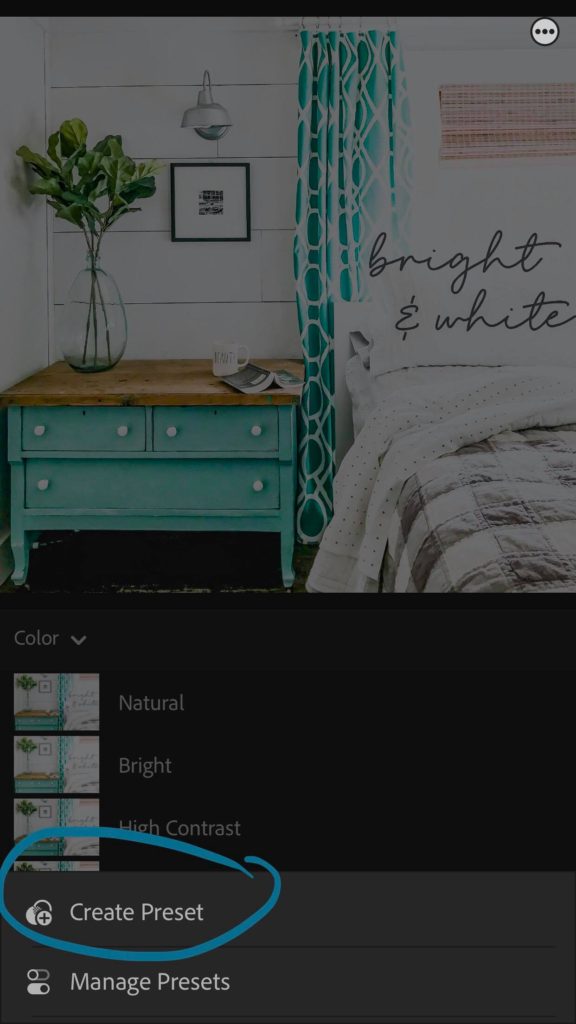
This will open up to let you create a saved preset in your Lightroom Mobile settings. Select CREATE PRESET.
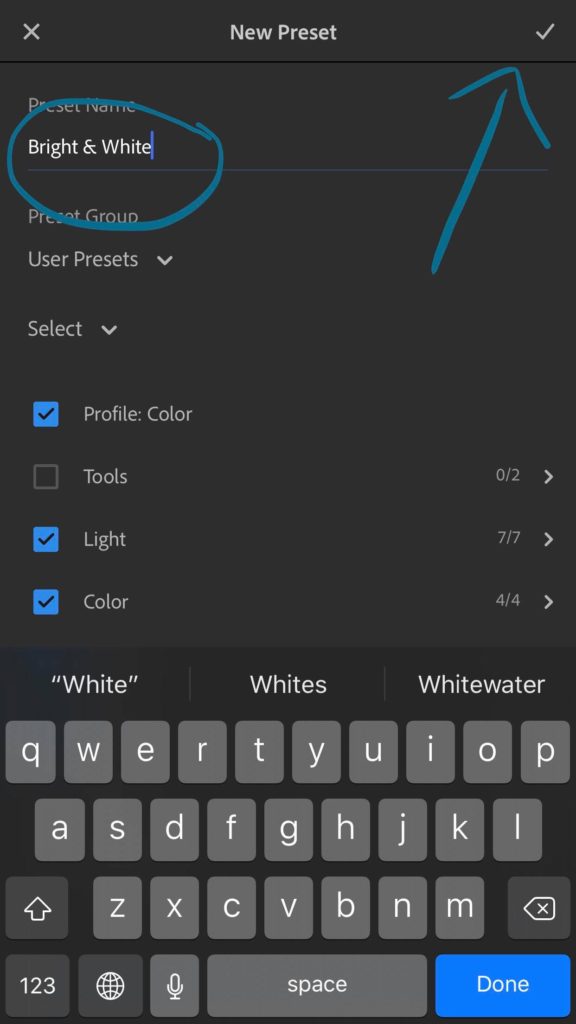
Name your preset (I use the name the creator gave it) and then click the checkmark in the upper right hand corner.
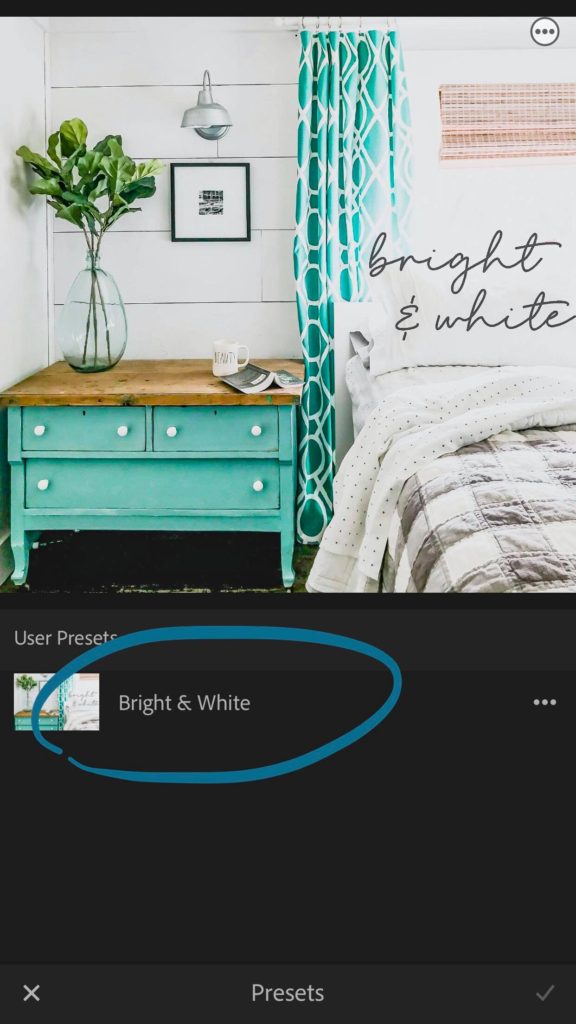
And your preset is now installed! It took you WAY longer to read this post than it will to actually do it yourself. Once you have it, then next time you get ready to edit photos, you just click on “Presets” – choose the one you want and BAM – you’re done!
Here’s a few examples of my Lightroom Mobile Presets:

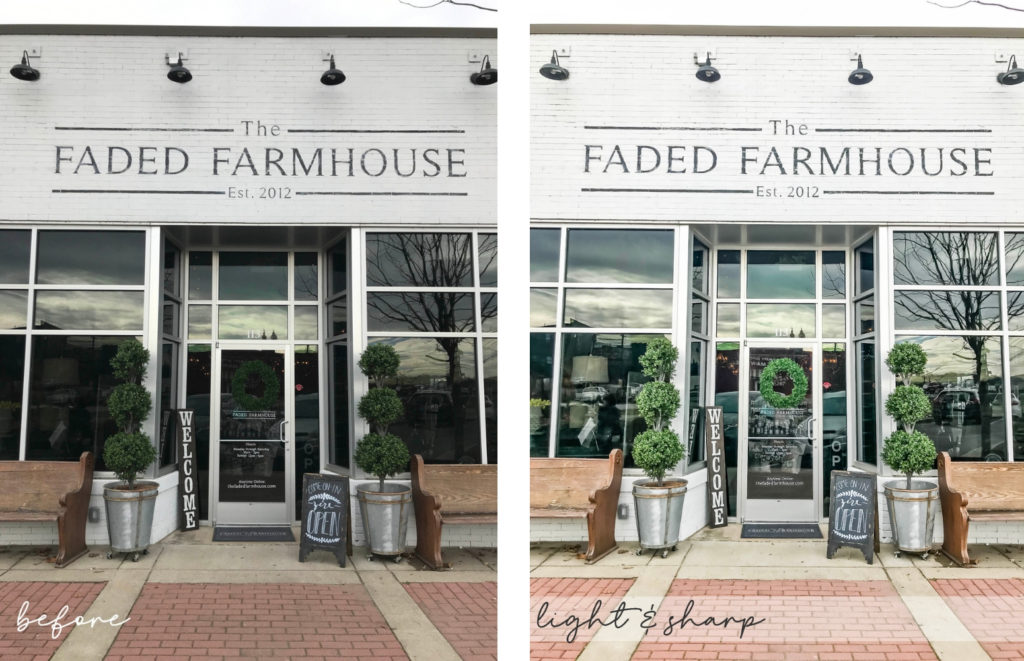

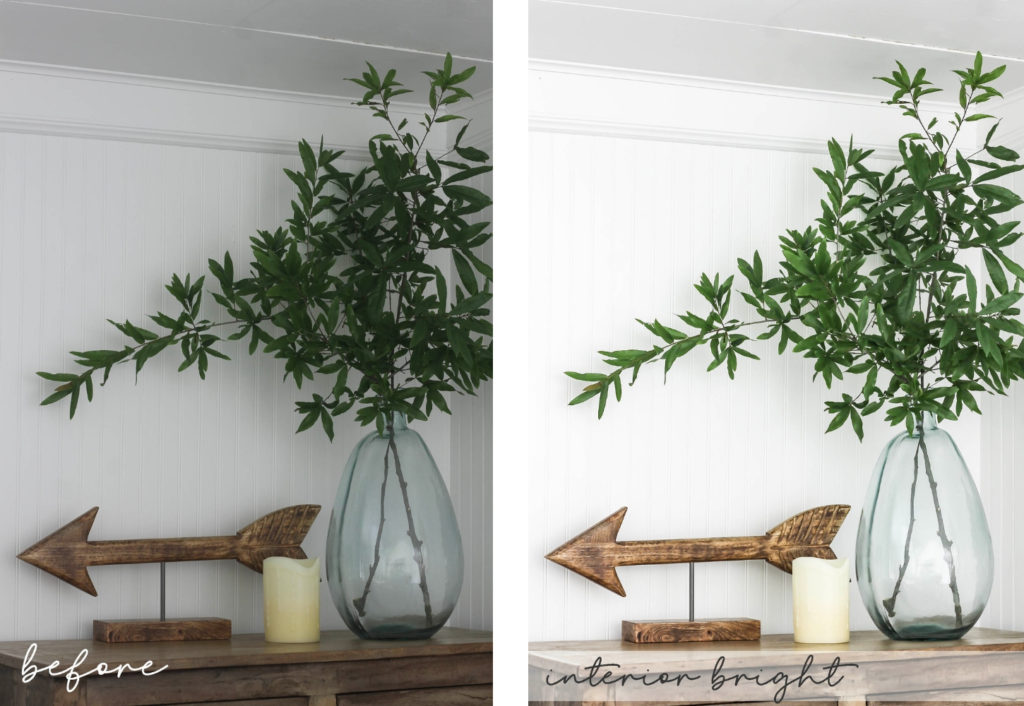
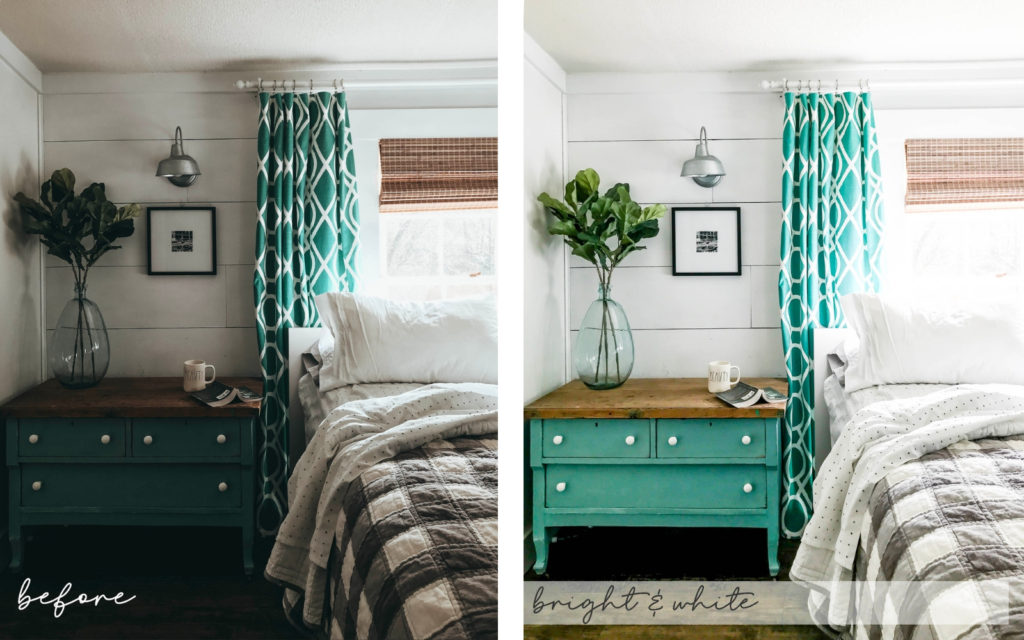
It’s truly astonishing to think that you can get those kind of results in about 2 seconds once you have all of your Lightroom Mobile Presets all installed onto your phone.
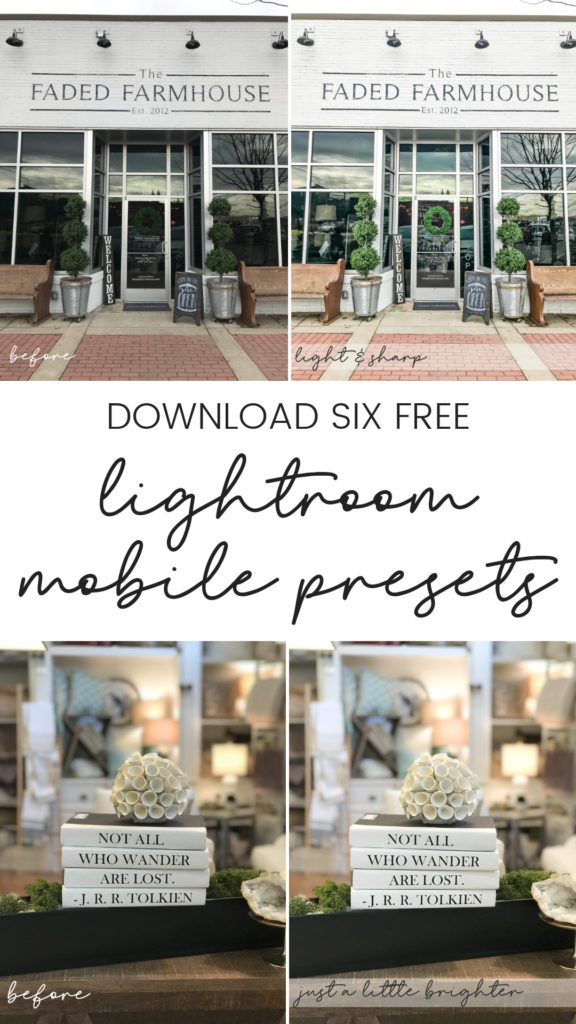
Want my FREE Lightroom Mobile Presets?
These presets are perfect for dark interiors to bring them to life. I use these same presets for many of my Instagram photos and they make editing a snap… or rather – a tap! Just enter your email address below and I’ll send you my set of Airy Interiors Lightroom Mobile Presets for absolutely FREE. It’s a package of six different presets that will help you make an Insta-Star <3
